Design workflow for handmade cards
How does Valentine’s Day week always get so crazy busy? Did yours? Yup, thought so. Here’s how I applied design thinking to make 11 unique cards in one evening.
This collage project started because I signed up to participate in Julia Parris’ Handmade Valentine Exchange.
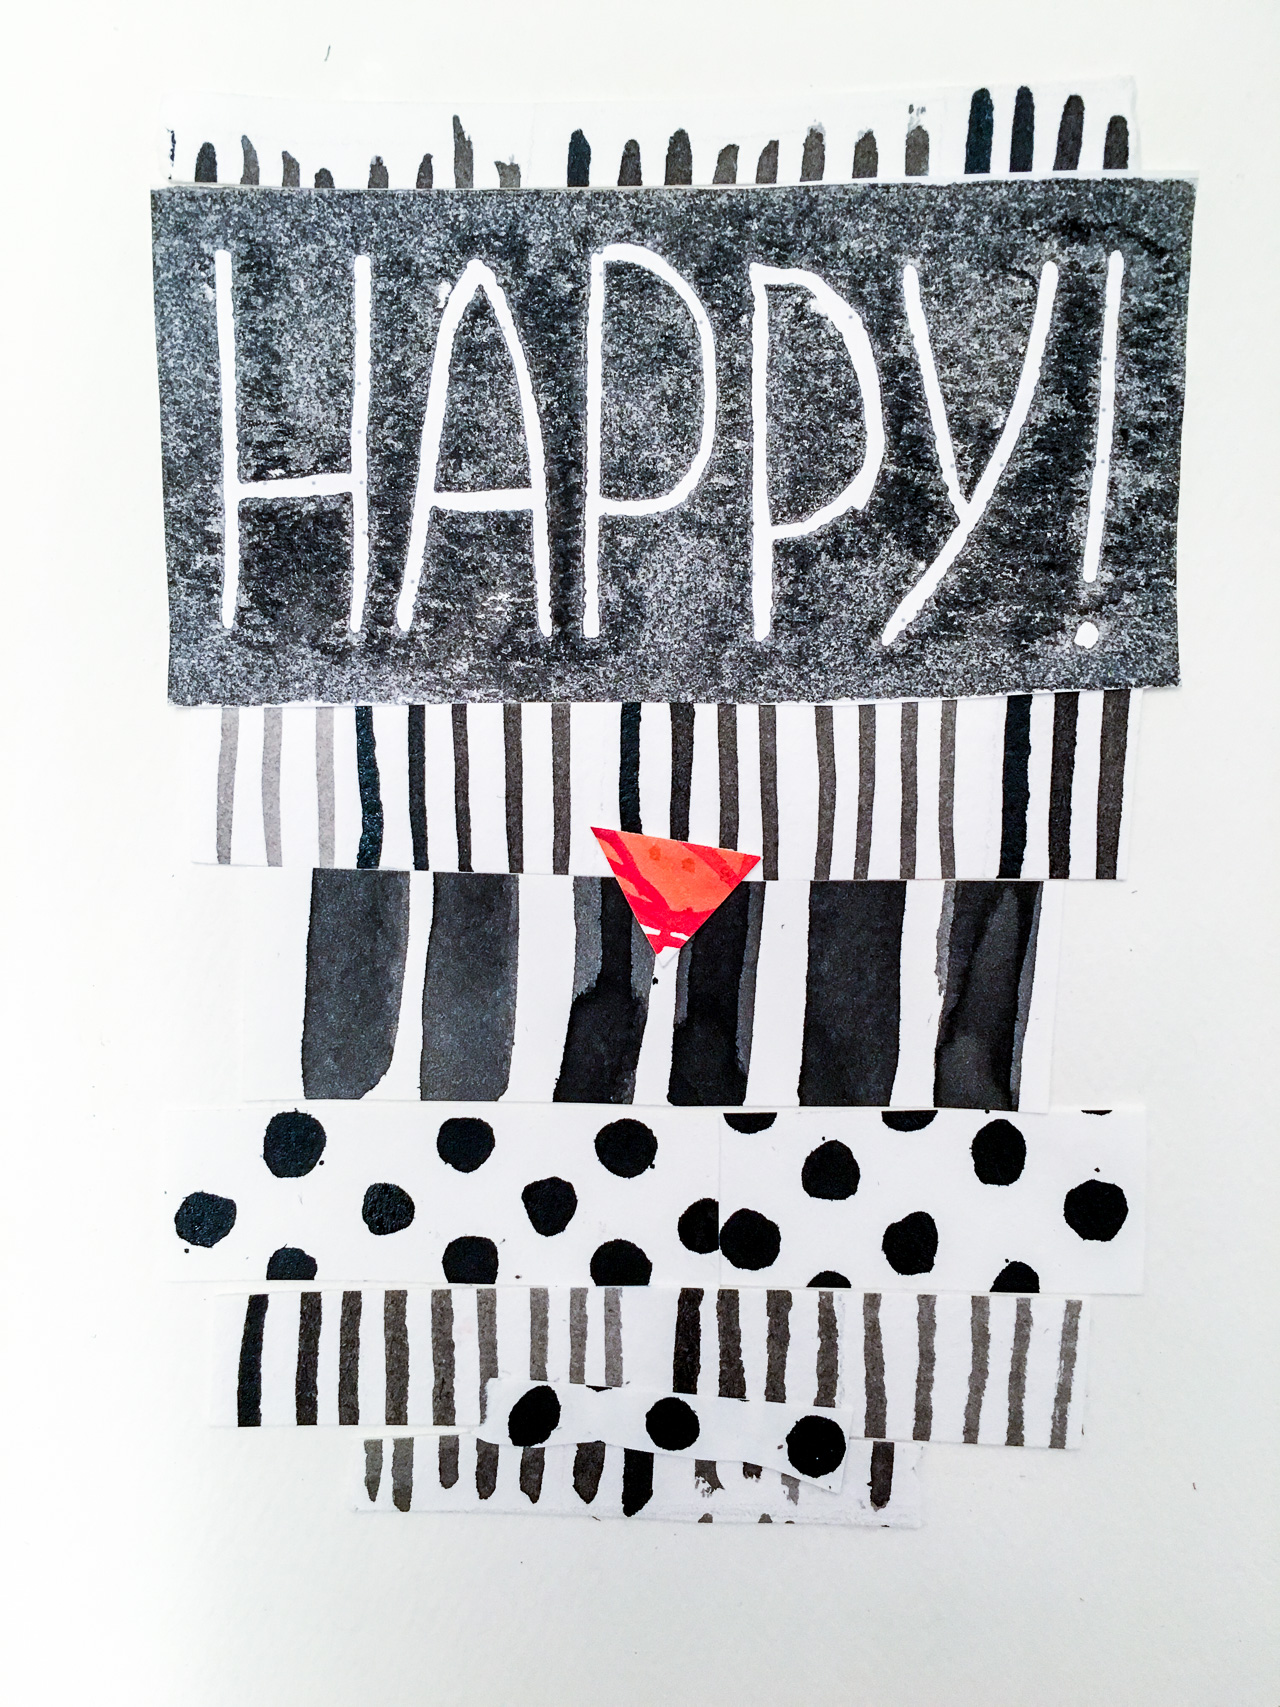
For any design project, I try to estimate the necessary effort, prepare as many of the ingredients ahead of time as possible, and then power through many iterations of a design to arrive at the best result possible given the time constraints. Even though I used pre-made materials, eleven unique collages can take a very long time to complete. To get it done, I batched similar tasks when possible, simplified the message to a heart and a carved stamp (instead of handwriting it, then obsessing over the quality of my handwriting), and then kept going till finished.

1: Prepare materials.
I know I would be making a batch of cards ahead of time, so I set aside completed sheets of patterns I’ve been making to experiment with brushes and ink. The only one I still needed to make was the red ink pattern for the hearts.
For this project, I used the Strathmore Blank greeting cards in Palm Beach White (a slightly warm white that matched well with my watercolor paper for collaging), Nori wheat paste style glue, scissors, and plenty of room on my table to lay out all the cards.
I also printed out the addresses to prevent errors and speed things up. Next time, I will also remember to prepare stickers with my own address, and perhaps plan to decorate the envelope to match the card inside.

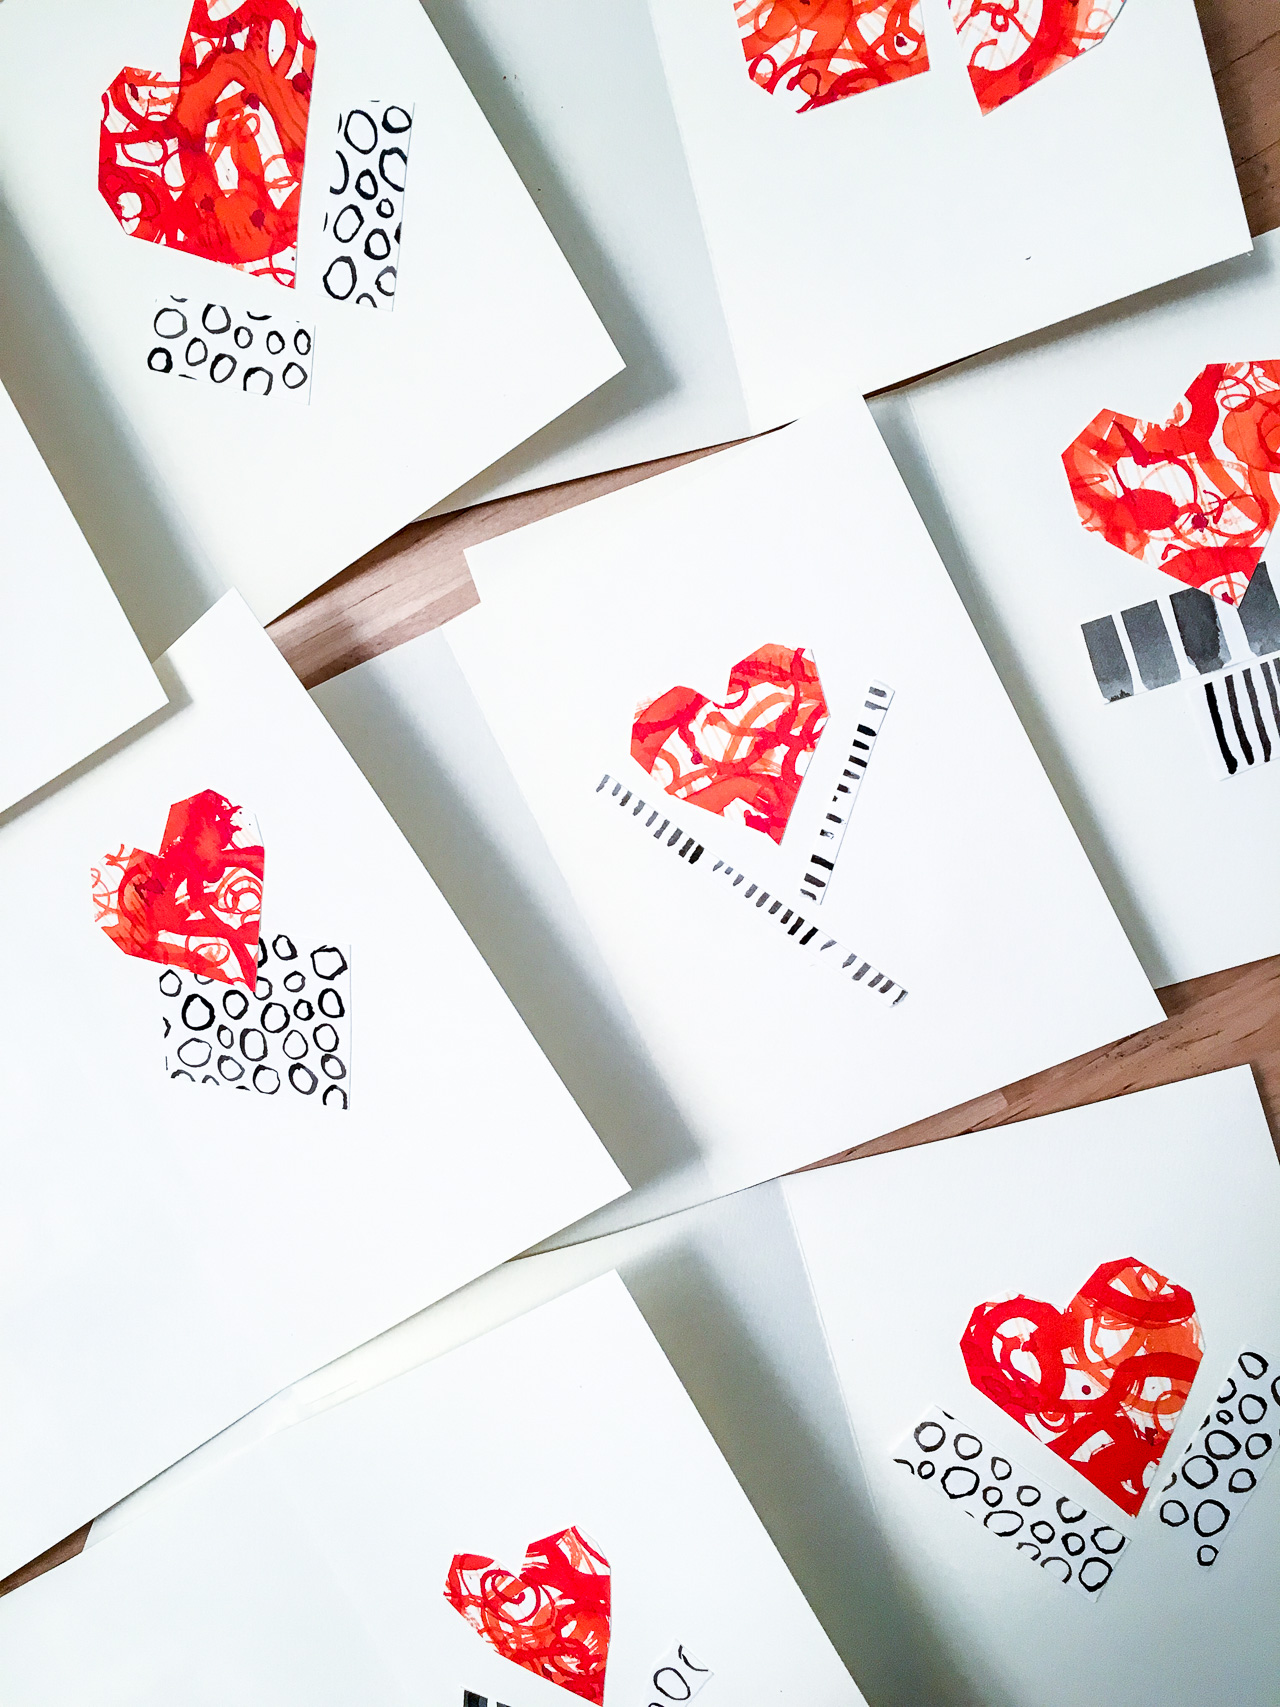
2: Cut out the heart shapes!
These are the content of the card. I used smaller bits left in-between the hearts on the front of the cards as a bit of a tease to indicate the color inside.
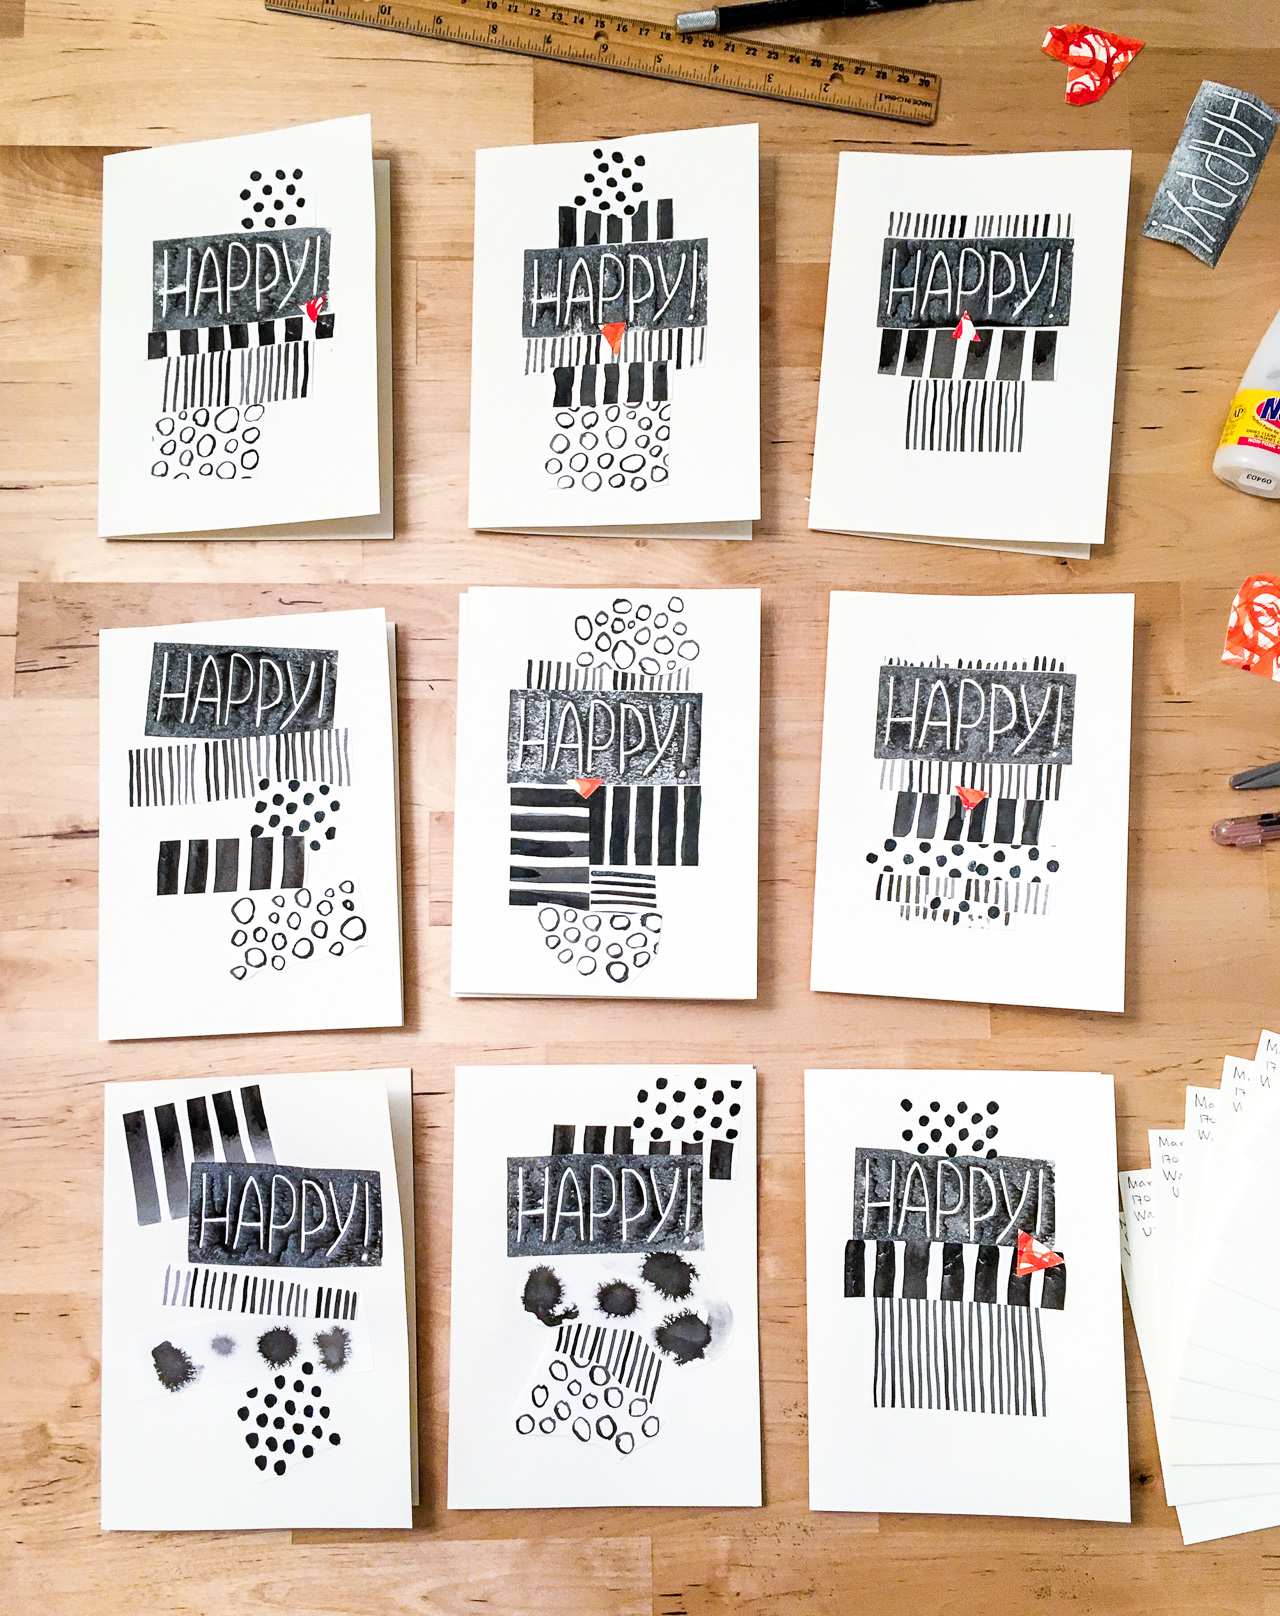
3: Iterate!
To make many unique variations, I started arranging several cards at a time, then gluing down the compositions. Doing three at a time lets me work faster, but by finishing several pieces and taking a short break in between I could evaluate what’s working, and improve my compositions for the next round.
4: Fill the inside with ♥
The inside of the card is very colorful compared to the outside. I tied the two looks together by using a bit of the black & white patterns near the red.
5: All done!
I’m pretty satisfied with how this project went: I got a somewhat coherent result and completed the cards I planned to make even on a very busy week. The entire production (not including painting the ink patterns) took about three hours. That’s about 16 minutes per card, all ready to go in an addressed envelope!
Happy belated Valentine’s to you!