My analog design tools
Today I want to share some of the analog tools that in my own workflow. I focus on analog because I think better when I can use different parts of the brain. And working on paper allows a different way of thinking compared to going straight to the computer.
My three favorite tools, in the order I use them:
- A clipboard with loose paper
- A notebook for writing
- Some color swatches
Here's how I use them in more detail:
1. The brainstorming clipboard
A wall-sized whiteboard in the office is great for brainstorming (especially in a group). Some of the ideas captured this way go on to sticky notes and, eventually, annotated pencil sketches.
For a similar type of thinking, I use a clipboard with loose pieces of paper and a marker. This set-up is not precious. It allows me to capture ideas quickly and discard many of them. I use copy paper left over from a previous project - 8.5 x 14 in. sheets cut in half. This way, I have plenty of cheap paper in a convenient, but large-enough size.
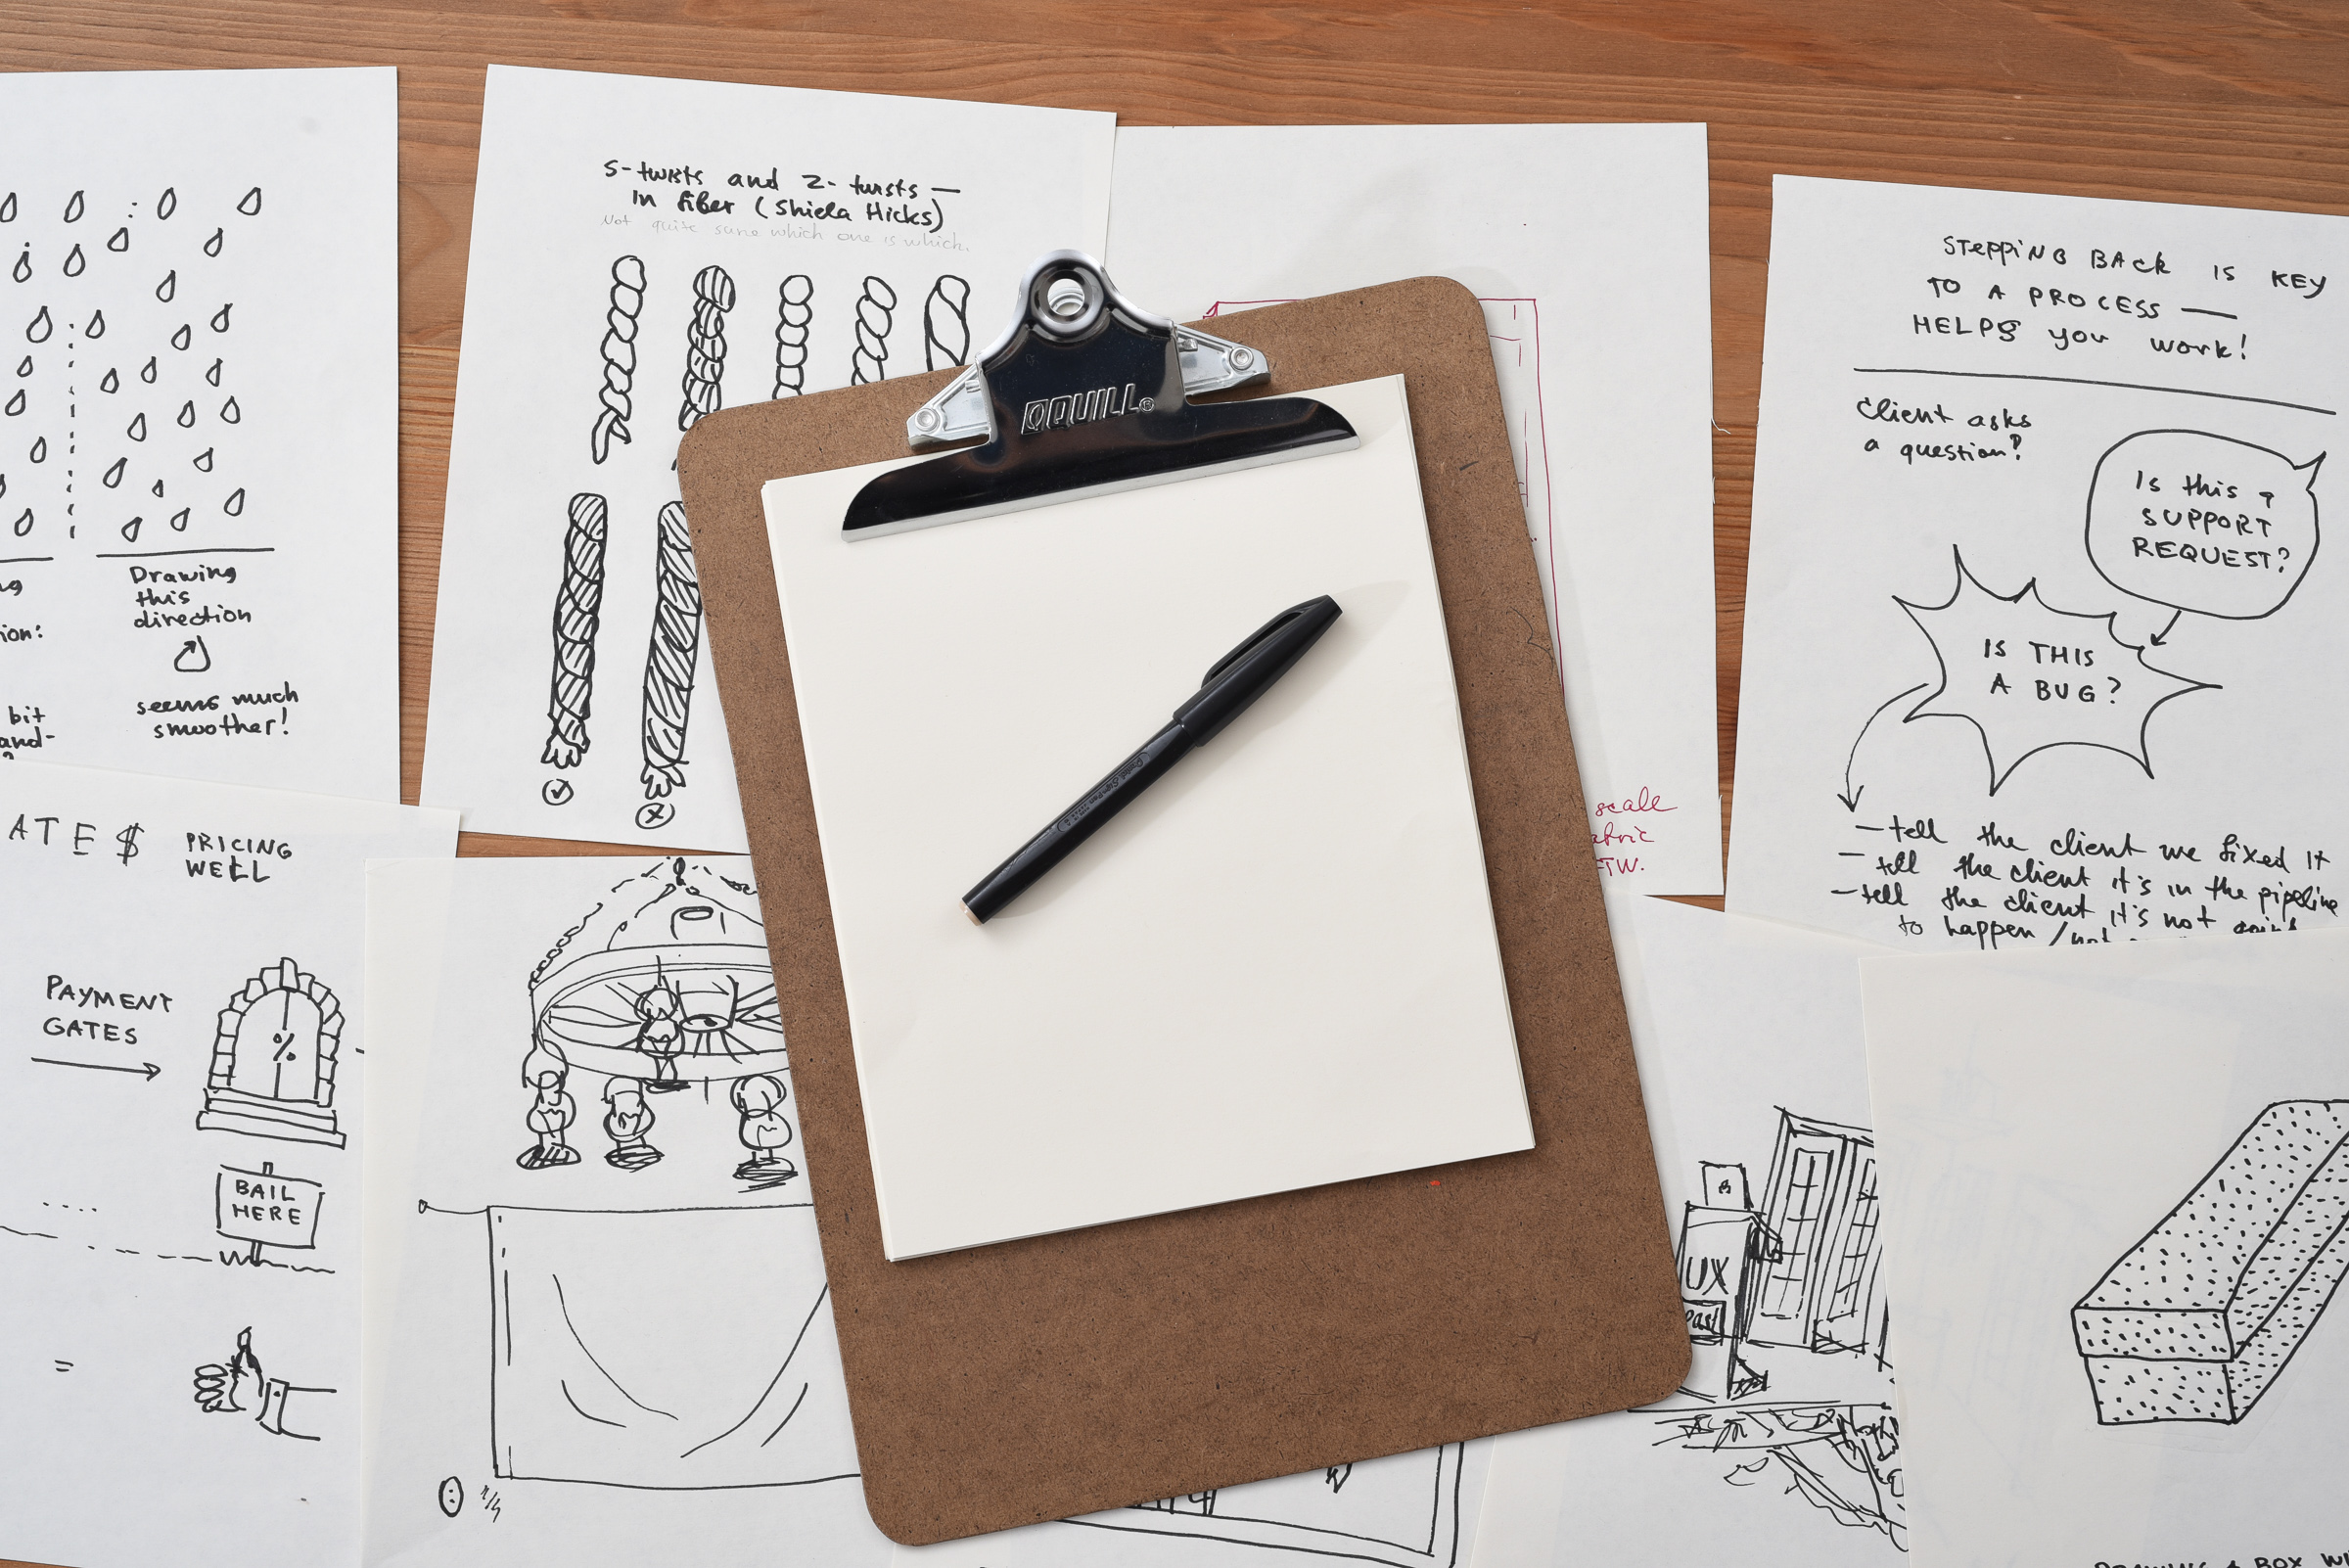
I draw with a felt tip marker. This is convenient for two reasons: I draw confidently right away with a strong black line, and when I do make mistakes, I just keep going. I leave these idea-capturing drawings messy on purpose.
Separate pieces of paper allow me to re-organize the drawings. I can throw out some that aren’t useful, and pull out the ones I want to develop farther. A sketchbook is good at keeping things in the order they were drawn, but discourages sorting and throwing out.
The paper I use happens to be light yellow. Color paper is not a necessity, but I enjoy having this color associated with thinking quickly and drawing ideas.
I also try to stick to annotated drawings, rather than writing, as much as possible. Paper allows me to think in a visual, spacial way much more than a text editor. By drawing the approximate shape of the thing I want to make, or a map of ideas connected by arrows, I think of a problem more holistically and can arrive at unique solutions quickly.
For example, drawing any physical object I’d like to make forces me to think through the aspects of it I might take off granted if I had just written it out. This drawing of a canvas tote I made shows the direction of stripes, which edges will be finished, and the approximate position of straps. Simply writing down “make striped canvas tote!” wouldn’t have forced me to consider the details in the beginning. This applies equally to a UX design project. A sketch of a user flow, a page or an app will force a spatial way of thinking and expose unanswered questions.
The writing notebook
When I prepared this post, I drafted and edited the outline in my writing notebook. My current favorite is a plan soft cover 7.5 x 10 in. Moleskine. The paper quality is a bit more precious than my sketching paper, and pleasant to write on. I do most of the writing with a thin pen or a pencil, and then go over and edit with a thin black marker.

Full disclosure here - this is what the draft of this post looked like. It’s not beautiful like some of the artists’ sketchbooks you may see on Flickr and Pinterest, but it does the job for me. In fact, highlighting and editing my own notes has been a habit since high school. A second layer of writing can make things look messy, but it helps me edit and condense the notes. It also makes it easy to go back later and find the key points: useful before an exam, or when trying to remember how I arrived at a specific design decision.

The slightly transparent paper of a Moleskine allows me to trace and improve my sketches, too.
3. The color swatches
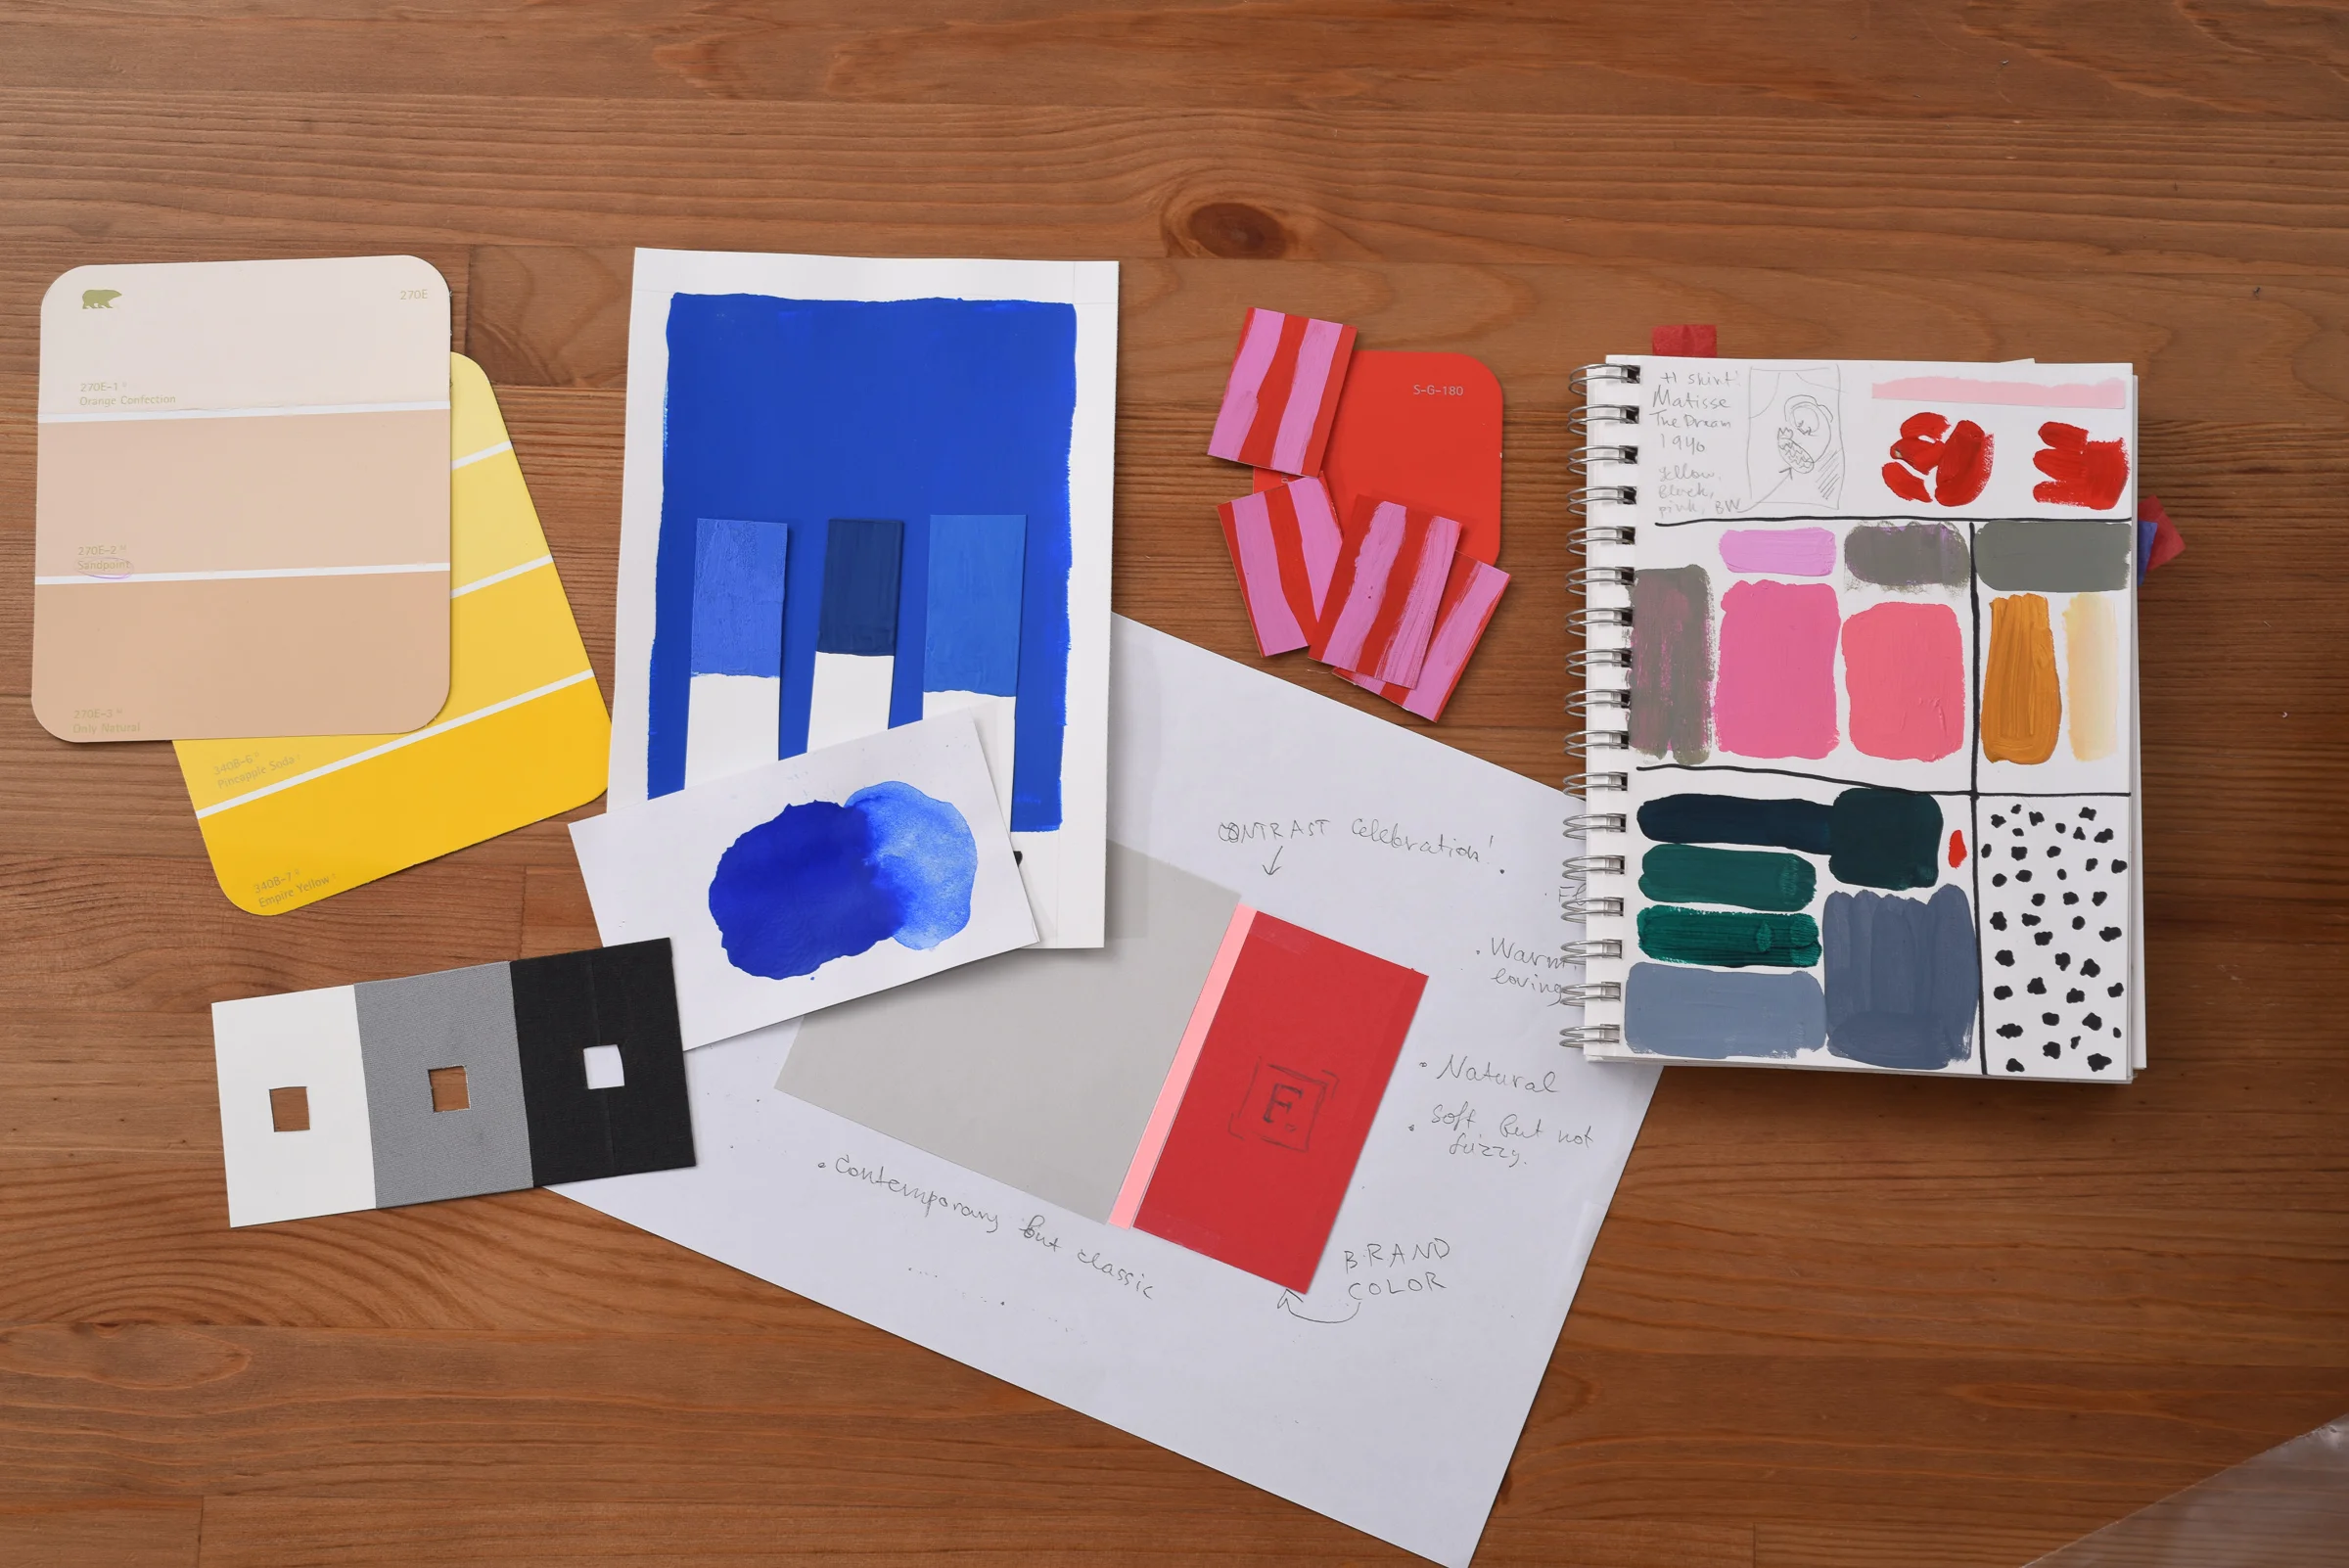
To select colors for a project, or to study the colors in an artwork, I like to work with physical swatches. Have you ever noticed that most art looks different - more “punchy” in real life than online? The number of colors and levels of brightness we see in person is far greater than what a computer screen can reproduce. So, when I am starting a project, I prefer to start in a broader, physical color space. Maybe even mix some paints, and then adapt the palette for use on a website or an app.
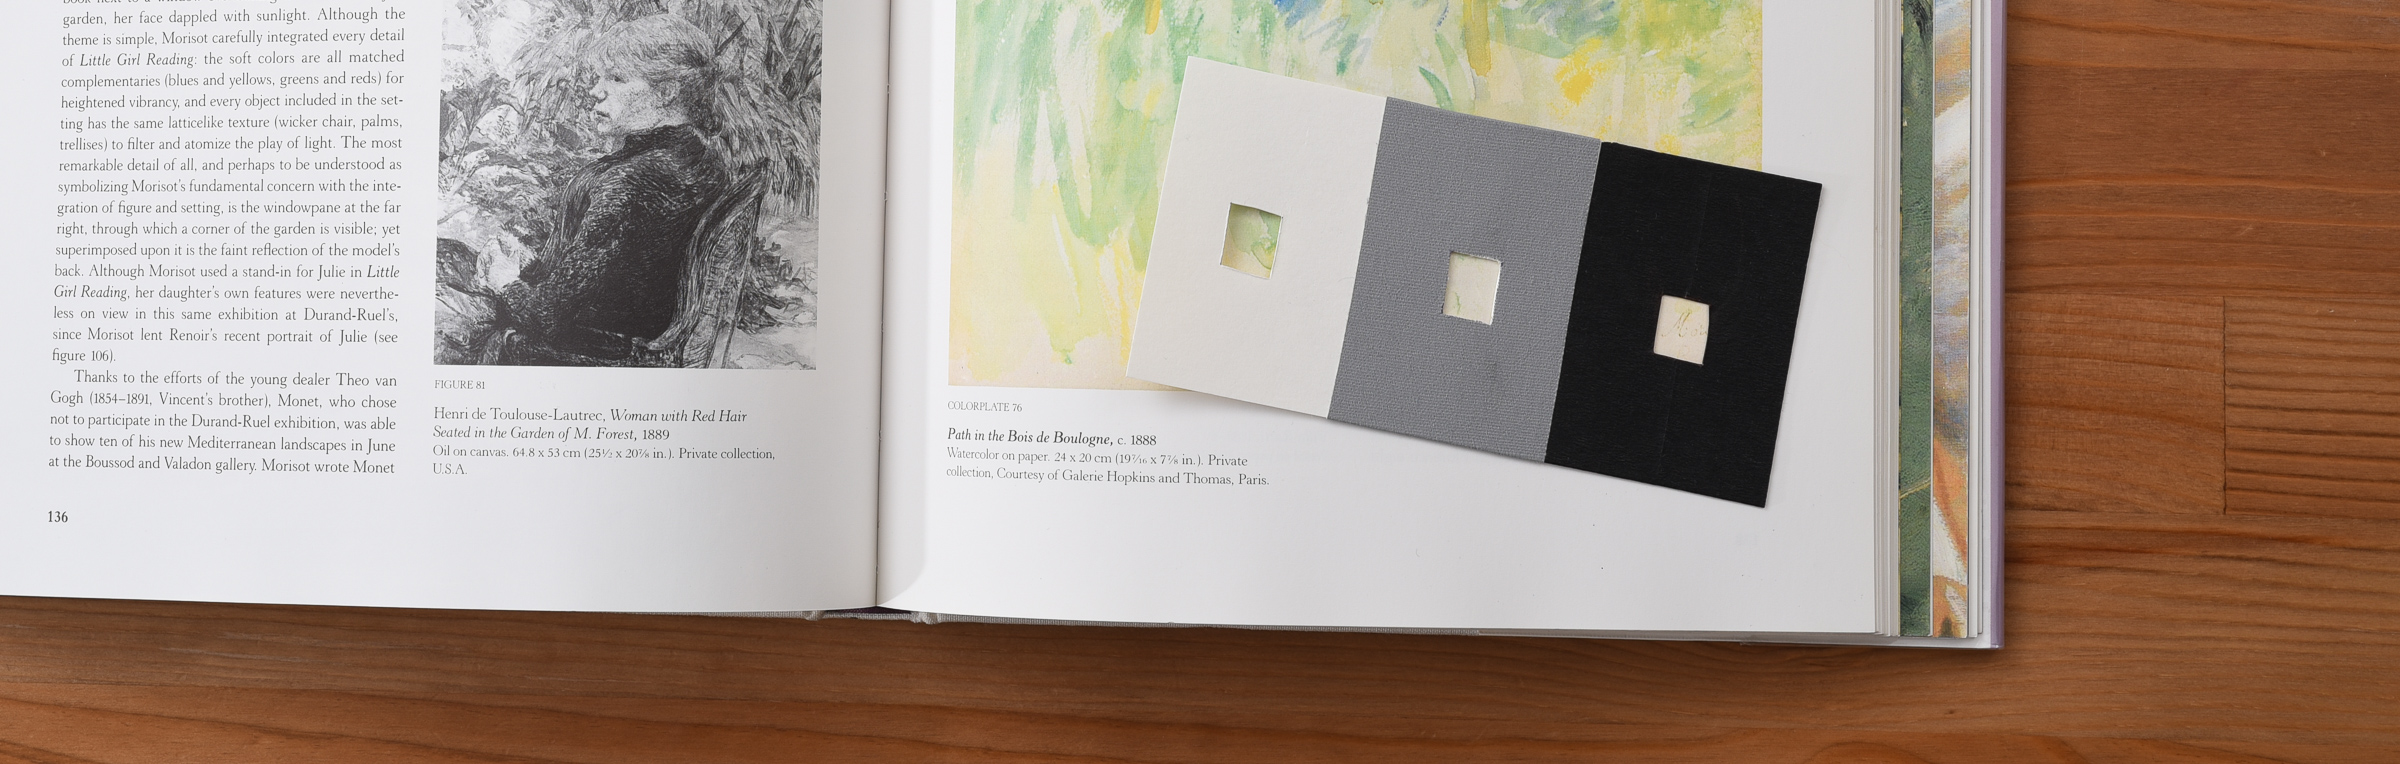
To help me find colors in real life, I sometimes use this tool. I adapted it from a book on watercolor technique. The natural gray, black and white with a small window isolate a small swatch of color in different contexts.
To study famous artists’ work, I sometimes try to match a printed reproduction by mixing paint myself. It’s a fun exercise!
Why so analog?
The only reason to pick one tool over another is that each tool is good at a different thing. Spatial thinking is great with a pen and cheap paper. Linear, structured writing may be best in a minimal text editor.
Different tools for different parts of your workflow give you a strategic advantage. They help separate your process into stages, so you can switch your thinking, and delegates each task to the tool that does it best.
These are the physical “drafting” tools that work for me. Yours may be very different, or entirely digital. I’d love to see what works for you!